
I was inspired to make these oven baked balsamic glazed chicken wings after watching Food 52’s Off Script with Sohla. Sohla El-waylly shares her adaptable oven baked chicken wing technique in an episode and it’s such a perfect–and simple–way to make an absolutely delicious baked chicken wing.
I ran with her technique and created this sticky balsamic glazed chicken wing topped with caramelized onions. I love this flavor profile. These wings are really addictive!
Oven Baked Chicken Wing Technique
Sohla’s technique boils down to three simple steps and a couple of tricks. The process takes some time which includes a lengthy phase in the refrigerator, but each stage is pretty hands off. So, this recipe takes some planning, but anyone can do it.
- Dry brine the wings. To dry brine, coat your wings in a flavorful, salty rub and refrigerate, uncovered, for 6-24 hours (longer is better if you can plan for it.) This step allows the salt to penetrate the wing and pull out some moisture. The dry, cool environment of the refrigerator dries the skin which leads to crispier skin during the baking process. The dry brine also includes baking powder which is a Kenji trick that helps the skin get crispier in the oven.
- Bake the slowly in the oven. Baking for an hour at a relatively low temperature allows the skin to render some of its fat which leads to crispy skin while the wings cook through. Baking the wings on a rack allows air flow to circulate around the wings and keeps them out of their fat.
- Glaze the wings with a tasty sauce and bake again. Once your wings are cooked, nicely browned, and crispy, toss them in a sauce (of your choice) and bake them at a slightly hotter temperature. This will reduce the sauce on the wings and make them deliciously sticky.
♥ Related: Buffalo Eggplant Sandwich
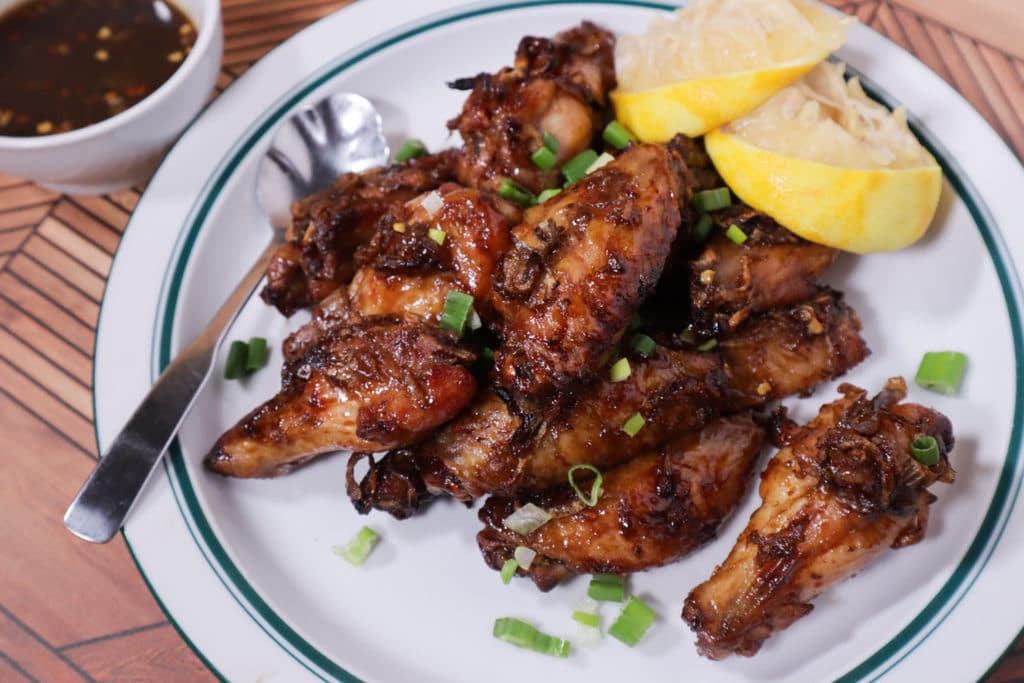
Oven Baked Balsamic Glazed Chicken Wings
I made these wings for that big football game in February and I just loved the sauce. There are a lot of layers of flavor: sweet from sugar and the balsamic vinegar, spice from Calabrian chilis, salty funkiness from finely chopped anchovies, and a bright tart note from a hit of lemon juice at the end.
I also made caramelized onions to toss into the sauce. During the second bake, the onions get extra caramelized and a little crispy. The onions are a very tasty touch.
This recipe makes enough for a meal for two people. It would probably serve four as an appetizer or if it’s part of a larger spread. You can easily double (or triple) it if you’re serving more people.
And while I love this sauce, I can’t wait to play with new flavor combinations using this baked chicken wing technique. So stay tuned for more wing flavors!
- Shop: Balsamic Glaze

Oven Baked Balsamic Chicken Wings
Ingredients
- 2 ½ lbs chicken wings separated into flats and drumettes
Dry Brine
- 1 tbsp kosher salt
- 1 tbsp sugar
- 2 tsp baking powder
- ½ tsp crushed red chili pepper
- lemon zest from one lemon
Chicken Wing Sauce
- ½ tbsp olive oil
- ½ tsp kosher salt
- ½ large onion cut into thin slices
- 6 tbsp sugar
- ¼ cup hot water just under a boil (to dissolve the sugar)
- ¼ cup balsamic glaze see note
- 4 cloves garlic finely minced or grated on a microplane grater
- 1 tsp crushed red chili pepper
- 3 anchovies packed in oil minced very finely
- 1 lemon zest and juice
- herbs of your choice parsley, green onions, chives, or basil will work great
Instructions
- In a large bowl, mix together the salt, sugar, baking powder, ½ tsp chili pepper, and zest of one lemon. Add the chicken wings to the bowl and toss to coat well. Remove and place the wings on a baking rack over a sheet pan lined with foil. Place the pan in the refrigerator, uncovered, for 6-24 hours. Flip the chicken wings halfway through this time. The longer you can let these rest in the fridge, the drier the skin will get, and the crispier the wings will get when they bake.
- Heat your oven to 350F. Once the oven hits 350F, move the wings from the fridge to the oven. Bake for an hour.
- While the wings are baking, make the sauce. In a medium, non-stick frying pan, heat ½ tbsp olive oil over medium heat. Add the onion and ½ tsp of kosher salt. Cook very slowly, stirring occasionally, until the onions become very soft and lightly golden brown. This will take about 45-minutes.While the onions are caramelizing, pull together the rest of the sauce. In a large bowl, add the sugar and hot water. Stir until the sugar is dissolved. Add the balsamic glaze, garlic, crushed red chili pepper, anchovies, and lemon zest. Whisk to combine well. When the onions are caramelized, add them to the bowl with the sauce and stir.
- After the chicken wings have cooked for an hour, remove them from the oven. Set the oven temperature to 375F. Using tongs, add the chicken wings to the bowl with the sauce. Toss to coat well. Remove them and place back on their rack. Use the tongs to pull out most of the caramelized onions from the sauce and evenly distribute them on top of each wing.
- Bake again for 20 minutes once your oven heats up to 375F.
- Add the juice of one lemon to the remaining sauce in the bowl while the wings are cooking. Once they are done, plate them. Drizzle the remaining sauce over the wings. Sprinkle with green onions. Or parsley. Or some torn basil.
Notes
- I’ve made the sauce with balsamic vinegar and balsamic glaze. Both taste great. But I prefer the balsamic glaze because it creates a stickier sauce experience. BUT, if all you have in the pantry is balsamic vinegar, these wings will still taste great–you’ll just miss out on the sticky glaze. Honestly, either way, you’re going to love the wings!
This post contains affiliate links. I may make a commission on qualified purchases from affiliate links that you click. Affiliate commissions help support this site so that I can keep bringing you great recipes, kitchen hacks, and product reviews.
 PepperMate Pepper Mill Review
Leave a Reply